When I first started sewing as a little girl, I remember my mom and my grandma helping me cut fabric on a cardboard cutting mat on a bed. I also remember the days when I layed my fabric out on the floor to cut it out or in more recent years when I had to move everything off the dining room table to cut fabric. I am fortunate to have my own dedicated sewing space now and I knew that I definitely wanted a cutting table. I sew on a large table that could easily seat six, but sometimes I have bigger projects and often I don’t want to have to move everything on my sewing table to cut out patterns. I looked at several places for a cutting table that would suit my needs and when I found the instructions to make this one on Pinterest, I knew it was the best option.
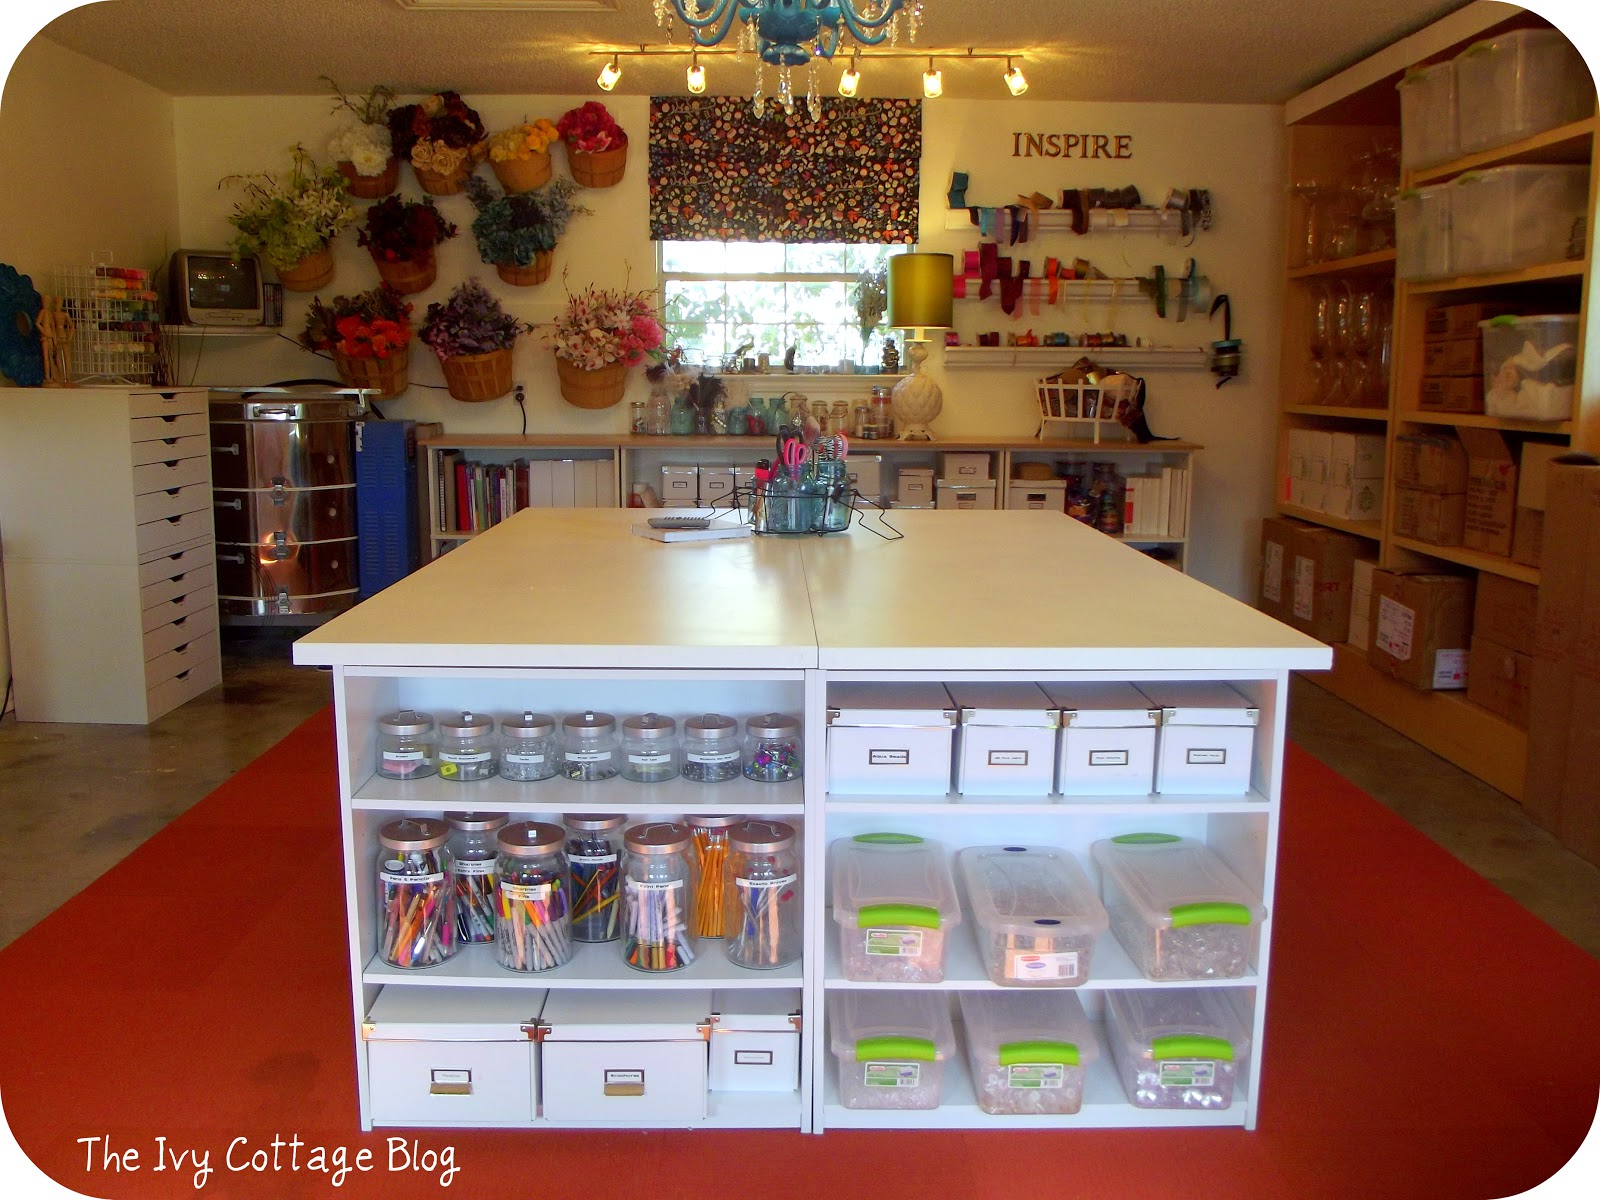
Craft/Cutting table from the Ivy Cottage Blog
The Ivy Cottage Blog, where I found the how-to on how to make this table has apparently since been removed, but you can see more photos of her table and her lovely craft space here. Hers is much more organized and bright than mine!

My Cutting Table
These are the supplies needed to make this table:
- 2 – hollow core unfinished doors (I got mine from Lowes for about $20 a piece)
- 4 – three shelf bookcases (mine are from Target for about $20 each)
- 1 – pint high gloss acrylic enamel paint (I used Olympic)
The longest part of this process is probably building the bookcases! I wanted white ones as the Ivy Cottage has, but I could not find enough in my area, so I went with this light birch color, which, since it matches my sewing table, seems to work just fine. Wouldn’t it be cool to paint these in a bright color? The table top would also look awesome in a different color! Maybe I will do that someday….. 🙂
After you put the bookcases together, paint the top and sides of the doors with the high gloss enamel paint. You will need two coats. This paint is excellent for this project as it’s tough and glossy. I was going to skimp and use materials that I had and painted the other side with flat enamel and then with polyurethane and that did not work out well AT ALL, so I painted the other side with the correct paint and it worked out great. So…. if you mess up, you always have the other side! 🙂
You can also add hinges to the doors to connect them together, but I decided not to do this as wanted to be able to easily move my table around if it need be. It takes a little arranging with your bookcases to get things set up perfectly, but if you have someone helping you, I’d imagine that it would be quick assembly job. My table currently sits on carpet, which makes it a little uneven, so my husband leveled out the countertop by putting magazines underneath.
And look at the all of the storage that you just got! You can keep all of your fabric stash underneath and organize the shelving. This gives you SO much space for things. My shelving currently has some of my husband’s record collection on it (soon to be rectified with a trip to Ikea) and once that’s gone, I will have even more space to put things.

Under table storage
I would show you more photos of the shelving with junk on it, but mine is not nearly as neat the Ivy Cottages’ photos…. someday!!! 🙂
I also decided to affix metal yardsticks on my table which is probably the best thing about having a table like this. I can easily measure fabric out on my table. It’s almost like having my own fabric store! 🙂

Cutting table yardsticks
I bought my yardsticks off of Amazon and used two for my table. I used my label maker to mark yardages. My yardsticks are affixed with gorilla glue, so they won’t be going anywhere.

Metal yardsticks
I keep my cutting tools in the center in a repurposed file folder holder with my cutting mat.

Ruler storage
For now, my table is pushed up against the wall, but when I eventually move into my new sewing space, I plan to have it in the center, which will allow me more use of it. This table also works great for wrapping gifts, and I have a little gift wrap supply area on one end with a little caddy carrying tape and scissors. I also plan on adding a bar stool or two to this which will make it more accessible and comfortable. And…. FYI… this table is a magnet for “junk”…. I currently have stacks of fabric and patterns laying on it waiting to be put away…..

My sewing room
Happy Creating!


I just finished my new cutting table from your design in this post! I had to do some modifications but I love the idea and the extra storage space! Thanks for sharing!
Awesome!!! I hope you love your table as much as I love mine!
only 3 bookshelves?
4 – 3-shelf bookcases. Not sure how I missed that typo!
Fabulous idea I’ll remember!
Congratulations on all your hard work!
D’el
Thanks! It’s a great table!
Hi Tanya,
I’m loving this look into your sewing space (so much so this is my first comment on your blog!). I see you’ve got your rotary cutter on your cutting table with a self healing cutting mat. I’m wondering if there is any kind of cutting table you can get which you can directly rotary cut onto it without harming it, other than covering the whole thing with cutting mats. Any ideas?
Thanks! Mon
Thanks, Mon! My MIL has a big cutting self-healing mat and I’ve seen some big mats at the stores. That would be a good idea to cover a cutting table with a mat like that, if you could find one. I’ve never seen a self healing table, but that would be an excellent idea. I have no idea how you’d make one, either. It sounds like olfa should get on the ball with that one!
I just love how you have so much storage space to store fabrics, patterns, notions etc! It is really a super sewing room! ~Laurie
Yes, it’s a ton of space!!! 🙂