
*Note: Portions of this post originally appeared on the Cali Fabrics blog.
Hello, friends!
I’m so excited to share this project with you! I’ve been dreaming of a green wool coat for some time now and last winter I decided that I wanted a 1940’s coat after watching the British show Home Fires. I knew exactly what pattern I wanted to use (the Decades of Style 1940’s Claremont Coat) — I just needed a push to sew it and bring my dream to reality. When I saw all of the beautiful wool melton coatings on the Cali Fabrics site, I knew this would be my fall project.
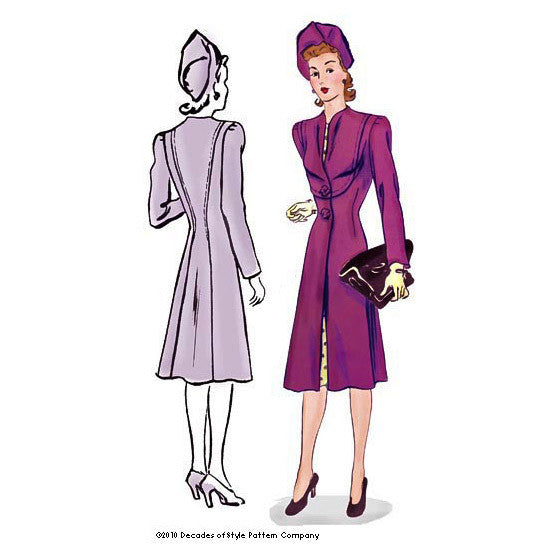
Source: Decades of Style Patterns

I chose the green wool melton for my Claremont coat. I talked to Decades of Style prior to sewing this coat and was informed that the fit was slim-fitting and designed for a lighter weight fabric. I went up a size from my measurements to both accommodate my fabric and to ensure that my coat fit over sweaters and wool dresses. I also widened the sleeves and enlarged the armscyes. I was advised to use a different fabric for the facings due to the weight of my wool, but I decided to try it with the wool instead. I trimmed a lot of bulk wherever I could to help them lay better and did a lot of pressing to ensure that they layed down as good as I could get them to.
Speaking of pressing, I did a whole lot of it in the making of this coat. My wooden clapper was definitely my best friend and I recommend purchasing one if you’re going to be sewing with wool. A clapper helps so well with pressing the seams down and getting good creases in your wool fabric.

My coat prior to attaching the lining
I followed most of the directions for sewing for this coat. I added grosgrain ribbons to hold the pockets in place and made shoulder pads that are sewn in before I added lining. I bought lining from Cali for this coat, but the amount listed for the 60″ wide lining was a misprint, so I didn’t have enough of that lining for this coat. Instead, I used some lining that I had in my stash which adds a bright pink party to the inside of my coat.

With the lining.
I added bound buttonholes to my coat along with vintage buttons. Instead of the machine made top-stitching that the pattern suggests, I went with a running stitch embroidered design that is a 1940’s design element. I ripped out my embroidery several times before just going with the flow as the stitches weren’t perfect. I looked at several vintage photos with the same technique and saw that none of them were perfect either, so I decided to stick with what I was doing. My stitches are a little shorter than the long running stitches that were often used. I considered adding the running stitch the hem and the sleeves, but decided that having it on the yoke and the back was enough.

I think my coat fits rather well. I’ve sewn many Decades of Style patterns and trust their drafting, so I didn’t make a muslin of this coat prior to sewing it. I did my adjustments on my pattern as I usually do and checked the fit as I went along. If I were to make this pattern again, I’d probably take a small wedge out of the back.


This coat was one of the most rewarding items that I’ve ever sewn. It took me about 3x longer to sew it than I thought it would, but in the end I am so incredibly proud of the work that I’ve done on it. This is the first wool coat that I’ve made and I cannot wait to wear it once the weather turns cold here in Northern California. I now have a coat in my favorite color that will go with so many of my dresses, plus it fits in my vintage inspired capsule wardrobe planning. What else could a girl ask for?

Also, I’ve finished the #1 one item on my fall/winter sewing list — A WINTER COAT!

Note: I received the wool melton fabric for this coat at no cost as a contributor for the Cali Fabrics blog. I received the coat pattern as a gift from Decades of Style. These are my honest thoughts and opinions.
Happy Sewing!

- Coat: Decades of Style Claremont Coat in green wool melton coating, made by me
- Hat: Vintage 1950’s
- Shoes: Calvin Klein
- Earrings: Gift from my mom

Tanya, you’ve inspired me to move forward. Your coat is so beautiful. I want to make a wool winter wrap but having trouble finding a store that sells melton lining. Does anyone know a store that has a selection?
You did a beautiful job! Fits so well. At the curvy sewing collective you mentioned doing a full biceps adjustment. I really need to learn hoe to do that and increase the arm scye too. Any ideas on where to find a tutorial?
Absolutely stunning! I’d never have thought of making this coat in plus size- but you’ve convinced me! Thank you for sharing! I love it!
You are a sewing queen this is a BEAUTIFUL coat & looks gorgeous on you the color is perfect. I remember my aunt’s wearing similar coats when I was a girl. They made all their clothing including coats. I have some buttons from one of my aunt’s coats I plan to use when I finish my purple jacket
What a stunning coat and so so flattering! Projects that take a long time really show all the thought and care you put into them. Thanks for sharing your adventure and the gorgeous result!
Gorgeous coat! Such beautiful details. I love the stitching and the lining colour is perfect!
love it, the color, the style, the vintage details. Such a beautiful style and it is perfect on you.
Thank you, Beth! I can see why you love to sew coats. I’ve learned so much from the coats you’ve made. I hope to use some of the construction techniques that you’ve shared on my next coat.
Wow Tanya, it looks amazing. That colour is so striking!
Thanks, Carlee! I love sewing this. I’m not sure why it took me so long to jump into coatmaking. Did you make yours yet?
HAHAHAHAHA no. I haven’t even traced out the pattern yet. I’m taking a course so I’ve been busy with that.
You’re making the Cascade duffle right? That one has SOOOO many pieces!
Yeah I am… I do wish I started with something easier but if I’m going to make something with wool$$$$ it better be in a style I really, really like. Hopefully I can make some good progress on it over the holidays. 🙂
The coat is truly wonderful. Nice job. I like the pink too.I like going through your post, it’s like going on a scavenger hunt. I always learn something. Way to go!
Thanks, Bonnie! Every time I try making something new, I learn something. 🙂
Amazing job!! I know you are just gonna love wearing this coat for years and years.
Thank you! Yes! I plan to wear this forever! 🙂
Oh my gosh! This is fantastic! I love the pink and green, what a cheerful combination to get you through winter!
Thanks, Lety! The pink and green was unplanned, but it makes me so happy to see the vibrant pink lining.
Ok, this is AMAZING! So much work, I’m sure, but totally worth it. I hope you have a fabulous holiday event to wear this to!
Thanks, Megan! It was a lot of work, but not as much as I think other coat patterns might be. It’s not quite cold here yet, but when it is I will sporting it often.
This is fantastic!! I love the green and the silhouette and contrast stitching are perfect. Well done!!
Thank you, Kelly! I so loved making it. Now it can get cold enough that I can actually wear it!